Configure a certificate-based connector to relay email from Exim to Office 365

In this blog post I will show you how you can send your emails from Exim to Office 365 via a TLS connector.
I will discuss the steps that I took to configure this in our environment so that you may have an easier time if you decide to go down the same route aswell.
Prerequisites
In the Exchange admin center, you will need to have your TLS certificate domain configured as an accepted domain in your Office 365 organisation.
To configure an accepted domain, you need to go to the Microsoft 365 admin center, click Settings > Domains and add your domain from there.
And of course you need your TLS certificate to use with the connector.
Exchange setup
To start, create your connector in the Exchange admin center
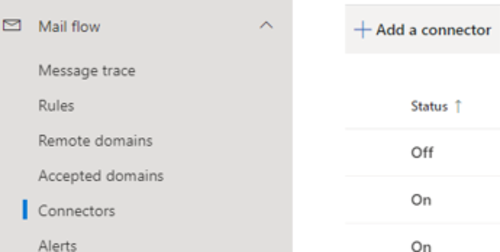
On the left sidebar click Mail flow > Connectors > Add a connector
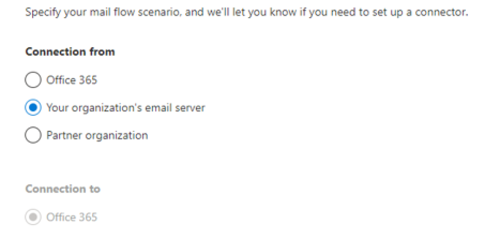
On the New Connector page, click Your organization's email server for the Connection from, then click Next
Specify a name for your connector and description on the Connector name page
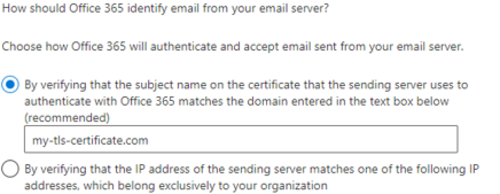
On the Authenticating sent email page, enter the domain name for your certificate
Once done, review the details and if it's all good, click Create connector. You should then see it on the Connectors page.
Exim setup
As per Microsoft documentation, you need to enable TLS on Exim.
To do this, on your exim.conf file set the TLS certificate and key like so
tls_certificate = /etc/ssl/my-cert.crt
tls_privatekey = /etc/ssl/my-key.key
However, we are not done yet. While this will enable TLS on Exim, it is only good for when Exim is acting as a server. In our case we want Exim to act as a client.
If we look at the Exim docs part 9
The
tls_certificateandtls_privatekeyoptions of the smtp transport provide the client with a certificate, which is passed to the server if it requests it.
Essentially the global option we specified above is not automatically passed on to the smtp transport.
In exim.conf, set the certificate in the smtp transport as such
remote_smtp:
  driver = smtp
  .
  .
  .
  hosts_require_tls = *
  tls_certificate = /etc/ssl/my-cert.crt
  tls_privatekey = /etc/ssl/my-key.key
I also set hosts_require_tls to force TLS for all outbound mail.
All good now! If you send some test emails from Exim, you can check they were sent via our connector by the Exchange admin center.
On the admin page, left sidebar, click Reports > Mail flow > Inbound messages report
Here you can verify that the TLS connector was used, as well as some other stats.
Comments
Join the discussionNo comments yet. Be the first to comment.